How to Make a Shield in Minecraft: The Ultimate 2025 Guide
Minecraft’s vast, blocky world is full of adventure—and danger. From skeletons firing arrows to creepers exploding at your feet, survival depends on smart preparation. One of the most underrated yet essential tools for staying alive is the shield. If you’re wondering “how to make a shield in Minecraft,” you’re in the right place. Introduced in the 1.9 Combat Update, shields offer a simple, affordable way to block attacks, deflect projectiles, and even add a touch of personal flair to your gameplay. As of March 14, 2025, this guide will walk you through every step of crafting a shield, gathering materials, customizing it, and using it effectively—whether you’re playing Java Edition, Bedrock Edition, or any supported platform. Let’s dive into this must-know Minecraft skill and get you equipped to face the toughest mobs!


Why You Need a Shield in Minecraft
Before we get to the crafting recipe, let’s talk about why shields matter. In Minecraft, danger lurks everywhere—especially in Survival mode. A shield can:
- Block Melee Attacks: Reduce damage from zombies, skeletons, and other hostile mobs by 100% when timed right.
- Deflect Projectiles: Send arrows, tridents, and even ghast fireballs back at your enemies.
- Mitigate Explosions: Lessen knockback and damage from creeper blasts or TNT.
- Slow Your Pace: When active, it mimics sneaking speed, giving you control in tense fights.
Shields aren’t invincible—they take durability damage with each hit and can be disabled by axes—but their versatility makes them a game-changer. Whether you’re exploring caves, battling in the Nether, or facing the Ender Dragon, knowing how to make a shield in Minecraft is a survival essential.
Materials Needed to Make a Shield
Crafting a shield is straightforward, requiring just two types of materials you can gather early in the game. Here’s what you need:
- 1 Iron Ingot: Smelted from iron ore, found underground from Y=-59 to Y=63 (best at Y=-59 with strip mining).
- 6 Wood Planks: Crafted from any type of wood log—oak, spruce, birch, jungle, acacia, dark oak, mangrove, bamboo, crimson, or warped. Mix and match as you like!
You’ll also need a Crafting Table, a 3×3 grid unlocked by crafting four planks from a single log in your 2×2 inventory grid. These materials are beginner-friendly, making shields accessible even in a fresh world.
Step-by-Step Guide: How to Make a Shield in Minecraft
Ready to craft? Follow these steps to make a shield in Minecraft, tested across all editions as of 2025:
Step 1: Gather Wood Planks
- Find a Tree: Punch any tree (or use an axe for speed) to drop logs. Each log yields 4 planks.
- Craft Planks: Open your inventory or crafting table. Place one log in any slot to get 4 planks. Repeat until you have at least 6 planks (2 logs minimum).
- Tip: Any wood type works—use whatever’s nearby. The shield’s appearance stays the same regardless.
Step 2: Obtain an Iron Ingot
- Mine Iron Ore: Dig underground (Y=-59 is optimal) with a stone pickaxe or better. Look for gray blocks with orange flecks.
- Smelt the Ore: Build a furnace (8 cobblestone in a crafting table ring). Place iron ore in the top slot and a fuel source (coal, wood, etc.) in the bottom. One ore smelts into one ingot.
- Alternative: Find iron ingots in village chests, shipwrecks, or mineshafts if mining isn’t an option yet.
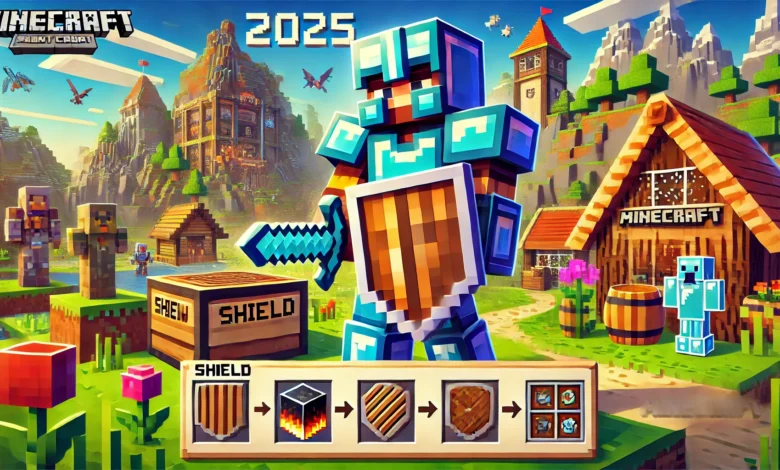
Step 3: Craft the Shield
- Open Crafting Table: Right-click or tap your crafting table to access the 3×3 grid.
- Arrange Materials: Place them in this exact pattern:
- Top Row: Plank | Iron Ingot | Plank
- Middle Row: Plank | Plank | Plank
- Bottom Row: Empty | Plank | Empty
- Collect Your Shield: Once the pattern is correct, a shield icon appears in the result box. Drag it to your inventory.
Congrats! You’ve just learned how to make a shield in Minecraft. It’s that simple—no rare items or complex steps required.
How to Use a Shield in Minecraft
Crafting is only half the battle—knowing how to wield your shield is key. Here’s how to use it effectively:
- Equip It: Open your inventory. Drag the shield to the off-hand slot (bottom-right shield icon next to your character). In Bedrock Edition, you can also place it in your hotbar and select it.
- Activate It:
- Java Edition: Right-click and hold to raise the shield.
- Bedrock Edition: Crouch (sneak) to activate it—usually the right trigger or a tap, depending on your device.
- Block Attacks: Face the incoming threat. The shield covers a 180-degree arc in front of you, blocking most attacks if timed within 0.25 seconds of impact.
- Watch Durability: Shields have 336 durability points. Each blocked attack of 3+ damage reduces durability by that amount (rounded up). Axes disable shields for 5 seconds, so dodge those!
Pro Tip: Pair your shield with a sword in your main hand for a classic knight combo—block with the shield, then strike back.
Customizing Your Shield: Add Some Style
Want to stand out? In Minecraft Java Edition, you can customize your shield with banners. Here’s how to make a shield in Minecraft look uniquely yours:
Step 1: Craft a Banner
- Materials: 6 wool (same color) + 1 stick.
- Recipe: In a crafting table, fill the top two rows with wool (3 each) and place the stick in the bottom-middle slot.
- Customize: Use a loom (2 string + 2 planks) with the banner, dye, and optional banner patterns (crafted or found) to create designs—stripes, gradients, symbols, and more.
Step 2: Apply the Banner
- Combine: In a crafting table, place the shield in the middle slot and the banner to its left (second row, first slot).
- Result: The shield adopts the banner’s pattern and color. Drag it to your inventory.
Note: Bedrock Edition doesn’t support shield customization yet—sorry, console and mobile players! Java users, flaunt those designs in PvP or survival worlds.
Repairing and Enchanting Your Shield
Shields wear down, but you can keep them battle-ready with these methods:
Repairing a Shield
- Crafting Table: Combine two damaged shields. The resulting shield’s durability is the sum of both plus a 5% bonus (up to 336 max).
- Anvil: Place a damaged shield and planks (any type) or another shield. This preserves enchantments but costs experience points.
Enchanting a Shield
Use an anvil (not an enchantment table) with enchanted books:
- Unbreaking: Increases durability (e.g., Unbreaking III reduces damage chance by 75%).
- Mending: Repairs the shield with XP orbs you collect—perfect for long-term use.
- Curse of Vanishing: Makes the shield disappear on death (PvP niche use).
Enchanting requires XP and lapis lazuli at the anvil—grind mobs or mine to stock up!
Alternative Ways to Get a Shield
Don’t want to craft? You can still snag a shield:
- Villager Trading: Journeyman-level armorer villagers (leather apron, welding mask) sell shields for 5 emeralds. Find them in villages or upgrade a villager with an armor stand.
- Loot: Check chests in villages, strongholds, or pillager outposts—shields occasionally spawn.
Crafting remains the fastest, most reliable method, but trading is handy in a pinch.
Tips for Mastering Shields in Minecraft
- Timing Matters: Raise your shield just before an attack hits—holding it too long slows you down.
- Arrow Deflection: Face a skeleton and block its arrow—it might bounce back and hit it!
- Creeper Strategy: Block the blast, then sprint away to avoid follow-up damage.
- Axe Counter: Dodge axe-wielding mobs (vindicators, piglin brutes) to avoid the 5-second disable.
Conclusion
Learning how to make a shield in Minecraft is a game-changer for any player. With just 6 planks and 1 iron ingot, you can craft a versatile tool that blocks arrows, absorbs melee hits, and even turns explosions into minor setbacks—all from a crafting table you’ll build minutes into a new world. As of March 14, 2025, this guide ensures you’re equipped for Java or Bedrock Edition, with customization for Java players and repair tricks for all. Whether you’re deflecting skeleton shots, surviving creeper ambushes, or styling your shield with a banner, this skill is your ticket to thriving in Minecraft’s wild landscapes. Grab your materials, hit that crafting table, and step into the fray—shield up, fearless, and ready for anything!